Showing posts with label Techniques. Show all posts

Wednesday, 14 October 2015

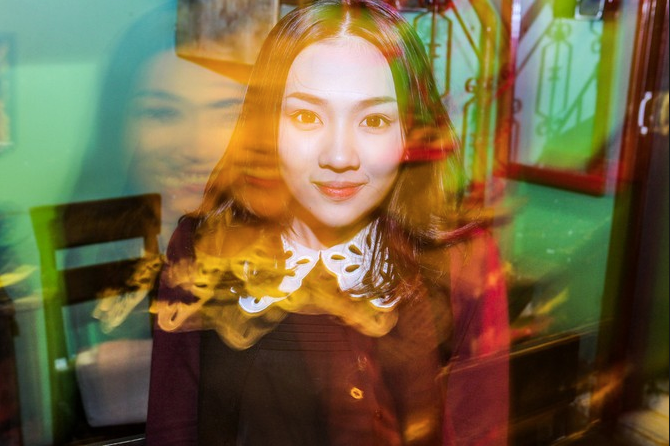
Blurring - Techniques page:

Blurring - Techniques page:

1. Change the ISO to the lowest possible setting, usually around 100. 
2. Change the setting of the camera to 's'.
3. Change the shutter speed of the camera to around 1/8, this will give you a long exposure to create a blur. 
4. When taking the photo you can either move the camera or the subject to achieve the blur. 

Monday, 12 October 2015

Multiple imagery - Technique page:

Multiple imagery - Technique page:

A multiple imagery is a way of showing 2 or more images in a interesting and creative way. These can consist of 2 or 12 the amount is up to the person and dependent on the shoot. 

1. Take enough photos to fill you multiple imagery (this will be of personal preference).

2. Edit all of the photos in your desired way and then flatten the images once this is complete. 
3. Create a new document in photoshop, ensure that it will fit all of your images on it. 
4. Resize all of your images using the crop tool, make sure that all of the images are the same size. 
5. Once your images are at the desired size, put them all onto the new document that you created and arrange them in a way that you are happy with. 
6. Save the image as a jpeg. 

Monday, 5 October 2015

Multiple exposure - Work diary

Multiple exposure - Work diary:

In todays session we was learning a new technique called Multiple exposure. A multiple exposure is the submission of two or more exposures put together as one image. The result is effective and a interesting technique. I enjoyed this technique and i like the final result that is created. I think that if i can think of a way to effectively make this technique fit into my project then i will use to as i think its effective and easy to achieve. The ideas that i currently have is to photograph a makeup table with a mirror and then maybe put a photograph of someone with makeup on inside the mirror. I think that this would work with my project as makeup and beauty is an area that i would like to explore.


Above is an example of a multiple exposure, you can see the to different exposures that have been joined together. In this photo i like the use of the hands to cover the face as if she was trying to hide her face, but the use of this technique still allows the face to be seen. 

Below is another example of multiple exposure. In this image the two separate images have been joined together as one instead of being laid on top of each other. In this image you don't see the whole of the building nor do you see the whole head of the girl. I think that this is a successful multiple exposure as it looks clear and the aim has been achieved. 

The image below is my example of a multiple exposure. I think that my image was a good attempt at a more basic multiple exposure. However i think to improve on my work, attempting one like the image above would be more beneficial. 


Monday, 21 September 2015

slow sync and high key - work diary

Slow sync  and high key - work diary:


In todays session we was working on the technique slow sync.  Slow sync works with a long extended flash and slow shutter speed along with a movement that takes place during that flash. I found that the concept of the technique is quite easy, however i personally found that it was quite hard to think of movements to do that would show a effective slow sync photograph. 


Progression:

If i was to do this task again i would think about the images that i would be producing. I think that i would need to develop my ideas further to think about how i would like my final image to look. I think that in doing this i would be happier with the images that i produce and that they would be more effective and show a more developed idea of the technique. 


Above is an  example of slow sync, i think that this photograph examples this technique effectively as there is the part of the photograph that is well exposed and well lit, as well as the part of the photograph that is distorted and showing the movement that is being made.


The image above is another example of a slow sync photograph, the background is blurred and the light around the subject as been distorted. The subject being in focus helps to develop the technique by give the eye something to compare the movement to. 


Above and below are my attempts at slow sync photography. I think that the idea of what i was trying to achieve came across in the photo above as you can see the movement of the ball and where its traveling. However i think that the distortion of Lauren's face (on the left) lets the photo down as that would be the part of the image that i would want to keep in focus. 

I think that the photograph below is a better attempt as the parts of the photograph that i wanted in focus stayed that way, however in the photograph you can still see the movement yet they are not as defined as i had wanted. 


High key photography: 

In this session we was working on the technique of High Key, high key works with the use of lighting to define the subjects of your photograph. You generally have an all white background and use the lights t focus on the subject to get the photo a well defined as possible. 

Progression:
I enjoyed the session on high key as i found that it was quite easy to use and was a very simple but effective technique. I think that the photos that i produced worked well at demonstrating the technique, and i think that this technique could be something i continue to use during the rest of my project. I think that because my topic is style the technique will work well as it will be an effective way of demonstrating the different styles that i want to show.


Above and below are two examples of high key photography. In both the colours are all smooth and bright so that they stand out. The white background lets the two people standout without making them look washed out or pale. The effect also help to see all of the features of the face especially peoples eyes making the colours standout.


Above and below are my two examples of high key photography. I think that my photographs work because of the white background meaning that the subject stands out in the photograph. I like the way that the technique works to show the face and the clothes. I think that this will be a good technique for my project.


High key - Straight images

High key - straight images:


slow sync definition post:

Slow sync - definition post:


Slow sync flash combines a burst of flash with a slow shutter speed. The result is a image that is distorted and shows examples of movement.


In the two images above and below, slow sync has been used so that the people in the image can make a shape using a light. This is effective because the delayed flashes helps to pick up all of the light and show the drawing that they are creating. This technique is a fun and unique technique and is a good clear example of slow sync.  


The image above is another example of slow sync. The background is the photo is blurred and you can't actually tell what is in the background. The boy has stayed in focus us the main subject of the photograph. This helps to show the effect of the slow sync as it is highlight by the contrast between the focused and unfocused aspects of the image.


In the image above a less obvious slow sync is being shown. The technique is still the same as you can see a distortion in the image. However this time the movement is less obvious. Instead of moving completely out of frame the subject haas just move over to the lift slightly but the same effect is still given. This is an example of that this technique doest just have to be used for big movements and can still be used simply and subtly and still be just as effective.

Thursday, 10 September 2015

What is fine art photography?

What is fine art?

Fine art is defined as a visual and creative art where the product is intended for creative intellectual and an aesthetic content.


The picture above is photographed by Kirsty Mitchell, in the photo a young women is stood in the middle of a field in a bright colourful dress. The colour in the dress stands out and is enticing bringing in attention. The field that has been chosen compliments the photo with the purple lavender in the background alongside the use of green and blue. This puts a more outspoken choice of outfit in a natural setting. I think that this could be a way of breaking the social norms of outfit choice. it can be suggested that the photograph is trying make it more acceptable for people to be open to wear their the close that suit their personality.

The denotation to the image is that the photographer has chosen the colours in the field to compliment the dress and allow it to work and look attractive so that the outfit that is being worn is being advertised. This is what is used by photographers for magazines to promote new styles of fashion. 


The connotation to the image is the literal meaning that is portrayed through the image. In the  image above you take it literally by looking at the bright colours. It can be suggested that the use of the colours is to portray the bright out there style of the model. They are able to show their style through the colours and the more daring outfit. 

Wednesday, 5 August 2015

Multiple imagery - image bank

Multiple imagery - image bank:


The image above is a multiple imagery of one person that has been photographed at different angles and then mixed around in a multiple imagery. This is a more interesting way of showing some photographs and is more entertaining for the eye.  It a more creative way for photographers to show their work.


The image above is a less obvious multiple imagery but is still a multiple imagery. Again this is a more creative way to show the photographs and to show scene. I would like to attempt something like this in my project as i think that its very creative and breaks away from the typical multiple imageries.


Above is another example of a typical multiple imagery and has been used to show the picture of the tree in a more interesting way. This is achieved as the tree has been distorted for the image to be achieved and more exciting.


The image above is an example of a multiple imagery being used as a part of a sequence. This is effective as you can tell stories and show journeys with you image. i think this is something i would like to do with my project as it would be an new thing to do when looking at multiple imagery.


The two images above and below show a multiple imagery being used as a sequence again but this time it being a fluid sequence that progresses into the next image. In the image above the different shape adds to the originality of the image. The image below is effective because of the transformation in colours. This is a interesting style to look at as its different and is a creative way to look at colours of the same scene.


Sunday, 21 June 2015

Wide angle and close up - work diary

Wide angle and close up - Work diary:


In todays session we was focusing on the topics of wide angle and close ups. I found that this was quite an essay session to go out and shoot and the success of the photos all depended on the angle of the camera. I found that many of my photos in this shoot were quite successful, and i feel that i could continue to use this topic later in my project.


Above is my example of a close up. In the image the background is blurred and the main focus of the image takes up the majority of the frame. In the image the colour is clear and each single petal of the flower are defined. You can also see clearly the inside of the photo. I think that this is a successful close up photo.


Above is my attempt at a wide angle photograph. I feel like this is quite a successful image as the angle of the camera has helped to highlight the angle. In the image there is no one main focus point and the further in the distance of the photo the smaller the elements get.

Progression:
Both of these techniques have worked out well for me and i think that they could be useful in my project. They can help me to capture different elements of style without having to always use the same style of photograph.


Thursday, 18 June 2015

Close up - straight images:

Close up - straight images:


Image within image - work diary

Image within image - Work diary:


In todays session we was again learning a new technique, we was combining two photos together in one image. I found that this was a successful task as i was quite happy with the two images that i produced. I have been enjoying the sessions where we are learning new techniques as i am able to think about how they could work in my project and how i can progress them further.


The image above is my first attempt at this technique. I feel that its not bad for a first true but you can clearly see some distortion in the image in the frame. This is a skill that i would practice if i chose to continue using it.


The image above is my second try where i am already seeing some improvement. However i am still not completely happy with it and feel that i need to practice this form of skill.

Progression:
If i choose to include this technique in my project i would make sure that i practice so that there is a development in what i produce.

Background in frame, picture within a picture - straight images

Background in frame - picture within a picture:


Video within a frame - Straight images

Wednesday, 17 June 2015

Sequence - Technique page:

What is a sequence?

A sequence is a series of photographs, continuously joined together or combined as one to show an action or series of events.


How to create a sequence?


For the best result using a tripod is essential to ensure that your frame has not moved during the sequence. 


You set the tripod up with the camera facing the area that you would like your sequence to take place.


You then take your photo once you have decided what your first frame will be.


You continue to take your photographs of the changing scene until you have taken your desired amount for your sequence. ( you do not move the tripod)

On a blank canvas in photoshop you resize all of your photos and bring them onto the canvas to be placed into the sequence. 


You choose where each photo will go and if their are gaps in between each photo, and a border surrounding.

Sequence in one photo - Straight images

Sequence in one photo - Straight images:


Thursday, 11 June 2015

Animation

Anamation photo IMG_0037edit_zpsk8ry0sr1.gif

Animation - Technique page:

Animation - Technique page:

An animation is something that can be formed from one single image, or a selection of images put together. The animation can show a moment of a figure or object in the image or can be something as simple as changing the colour.
Below are the steps to create a simple animation.

1. Take images as desired, it is advisable to use a tripod to ensure stability. 
2. Upload these images to photoshop, and edit them in the way that suits your project, e.g. adjusting the levels and curves, making them black and white.
3.Flatten all of your edited images, and then stack them on top of each other so that the all become separate layers.
4. Click 'Window' and then 'Timeline', select 'create frame animation'
5. Now you can add all of your images to the bar and order them.
6. Once you have formed your animation in a way that you are happy with, press play and then make any further adjustments that are needed. 
7. To save the image change the size to 20 and the resolution to 72, then save the image as 'save for web' ensuring that it is saved as a gif.

Sequencing animation

 photo IMG_0050_zpsatrl8ig6.gif

Monday, 8 June 2015

Location portraiture:

Location portraiture:

Apature f5.6
Focal length 18mm
Stood close to subject

Apature f5.6
Focal length 55m
Distance between subject